
Prism Grout is a high-quality‚ versatile grouting solution designed for tile installations‚ offering excellent stain resistance‚ durability‚ and ease of use‚ making it a top choice for professionals and DIYers alike.
1.1 Overview of Prism Grout
Prism Grout is a high-performance‚ single-component cement grout designed for tile installations‚ offering superior stain resistance and durability. It is formulated with specialty cements‚ recycled aggregates‚ and advanced chemicals to create dense‚ hard joints that resist stains and wear. Known for its ease of use‚ Prism Grout has a generous open time‚ allowing for efficient application and cleanup. It is ideal for various tile projects‚ making it a preferred choice for both professionals and DIY enthusiasts.
1.2 Importance of Proper Installation
Proper installation of Prism Grout is crucial to ensure optimal performance‚ durability‚ and appearance. Incorrect techniques can lead to uneven joints‚ reduced stain resistance‚ and compromised adhesion. Following manufacturer guidelines ensures the grout adheres correctly‚ dries uniformly‚ and maintains its stain-resistant properties. Proper installation also prevents common issues like grout haze or uneven color distribution‚ guaranteeing a professional-looking finish and long-lasting results for any tile project.
Surface Preparation for Prism Grout
Dampen the tile surface thoroughly before grouting to prevent the grout from drying too quickly. Pre-sealing or using Grout Release ensures easier cleanup and reduces haze formation.
2.1 Cleaning and Dampening the Tile Surface
Before applying Prism Grout‚ thoroughly clean the tile surface to remove dirt‚ dust‚ or old adhesives. Dampen the area with water‚ ensuring it’s moist but not soaking wet. This helps grout spread evenly and prevents premature drying. Avoid excessive water‚ as it can weaken bond strength. Use a clean sponge or cloth to maintain surface preparation‚ ensuring optimal grout adhesion.
2.2 Pre-Sealing or Using Grout Release
Applying a grout release or pre-sealing the tile surface is crucial to prevent grout from adhereing to edges or unwanted areas. CUSTOM recommends using AquaMix Grout Release for this purpose. This step ensures easier cleanup and protects surfaces from residual grout haze. It also helps maintain the appearance of the tile and prevents costly rework. Proper use of grout release enhances the overall quality and longevity of the grout installation.

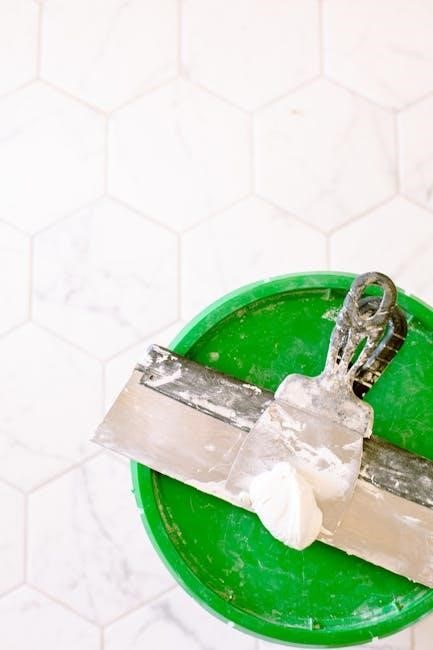
Mixing Prism Grout
Measure and blend dry powder thoroughly before adding water. Mix with a trowel or low-speed mixer‚ ensuring a smooth‚ consistent paste for optimal grout performance.
3;1 Measuring and Blending Dry Powder
Accurately measure the dry Prism Grout powder according to the manufacturer’s instructions. Ensure all components are well-blended to maintain consistency and color uniformity. Mix powders from multiple containers together before adding water to avoid shade variations. This step is crucial for achieving a professional finish and preventing color discrepancies in the final grout joints.
3.2 Adding Water and Mixing Techniques
Gradually add clean water to the blended dry powder‚ mixing thoroughly with a low-speed mixer or trowel. Avoid overwatering to maintain the grout’s dense structure. Mix until a smooth‚ lump-free paste forms. Proper mixing ensures optimal performance‚ making the grout easier to apply and enhancing its stain resistance. Regularly scrape the sides of the mixing container to incorporate all material evenly for consistent results.

Applying Prism Grout
Apply the mixed grout diagonally with a rubber float‚ holding it at a 45-degree angle. Press firmly to fill joints evenly‚ ensuring full coverage and alignment with grout lines.
4.1 Filling and Packing Joints
Fill and pack joints by holding the float at a 45-degree angle. Apply firm pressure‚ pressing grout deeply into gaps. Work diagonally across tiles to avoid pulling grout out of joints. Ensure complete coverage‚ especially in corners and edges‚ where gaps are more visible. Proper packing guarantees a strong‚ durable bond between tiles.
4.2 Striking Clean at an Angle
After filling the joints‚ hold the float at a 45-degree angle and sweep it across the tiles in one direction. Use firm‚ steady strokes to remove excess grout from the surface. Avoid applying too much pressure‚ which can pull grout from the joints. Regularly clean the float with water to prevent spreading residual grout. This step ensures a smooth‚ even finish and prepares the surface for haze removal.

Haze Removal and Cleanup
Haze removal is crucial after grout sets. Use cheesecloth or a damp sponge to clean residual grout haze‚ ensuring a streak-free finish. Change water frequently to avoid residue buildup.
5.1 Timing and Tools for Haze Removal
Timing is key for effective haze removal. Wait at least 3 hours after grouting before cleaning. Use a clean‚ wrung-out sponge or cheesecloth to gently scrub the surface. Avoid using excessive water‚ as it can weaken the grout. Change the water frequently to prevent dirt and grout residue from redepositing onto the tiles. Regular rinsing ensures a clean‚ even finish.
5.2 Cleaning Residual Grout Haze
For residual grout haze‚ dampen the sponge and gently scrub the area‚ ensuring not to apply too much pressure. Rinse the sponge frequently to avoid redistributing grout particles. After cleaning‚ use a dry cloth to wipe away excess moisture‚ preventing new haze from forming. Regular maintenance and sealing can further protect the grout and enhance its appearance.
Sealing Prism Grout
Sealing Prism Grout enhances its stain resistance and longevity. While not always necessary due to its dense formulation‚ sealing is recommended for added protection and easier maintenance.
6.1 When Sealing is Necessary
Sealing Prism Grout is essential in areas exposed to heavy foot traffic or moisture‚ such as kitchens and bathrooms. It protects against stains and extends the grout’s lifespan. While Prism Grout is dense and stain-resistant‚ sealing adds an extra layer of protection‚ making maintenance easier and ensuring the grout remains vibrant and durable over time.
6.2 Protecting Adjoining Surfaces
Always protect adjoining surfaces like wood‚ metal‚ or countertops during Prism Grout installation to prevent damage. Use masking film or plastic barriers to cover these areas. For movement joints or changes of plane‚ apply a suitable caulk or sealant‚ such as Commercial 100% Silicone Sealant‚ instead of grout. This ensures flexibility and prevents cracking‚ while keeping the grout confined to its intended joints for a professional finish.
Common FAQs and Troubleshooting
Common issues include grout haze removal and difficult clean-up. To address‚ moisten the tile with a sponge‚ wait 1-2 minutes‚ then gently scrub for a clean finish.
7.1 Difficult Grout Removal Solutions
If grout becomes stubborn during removal‚ lightly moisten the tile surface with a sponge‚ wait 1-2 minutes‚ then gently scrub. For haze‚ use cheesecloth or a wrung-out sponge after 3 hours. Change water frequently to avoid spreading residue. Avoid harsh chemicals to prevent damage to the grout or tile. Regular cleaning and proper mixing during installation can minimize removal challenges‚ ensuring a smooth finish.
7.2 Avoiding Movement Joints Issues
Prism Grout should not be used in movement joints or changes of plane‚ as these areas require flexibility. Instead‚ use an appropriate caulk or sealant like Commercial 100. Proper planning ensures structural integrity‚ preventing cracks and damage. Improper installation in these areas can lead to grout failure. Always follow manufacturer recommendations for movement joints to maintain durability and avoid costly repairs‚ ensuring long-lasting results for your tile installation projects.
Advantages of Prism Grout
Prism Grout offers superior stain resistance‚ creating dense joints for durability. Its ease of use‚ great open time‚ and high-quality finish make it ideal for various tile installation projects.
8.1 Stain Resistance and Durability
Prism Grout is renowned for its exceptional stain resistance‚ creating super-dense joints that repel spills and stains. Its durability ensures long-lasting performance‚ even in high-traffic areas. The specialized formula resists water and stains‚ making maintenance easier and extending the grout’s lifespan. This combination of strength and resistance makes Prism Grout a reliable choice for both residential and commercial tile installations‚ ensuring a pristine appearance over time.
8.2 Ease of Use and Open Time
Prism Grout stands out for its ease of use‚ featuring a single-component formula that simplifies application. Its extended open time allows for more flexible working conditions‚ giving users ample time to apply and adjust without rushing. This makes it ideal for both professionals and DIY projects. The grout can be left on the surface‚ reducing stress during installation and ensuring a smooth‚ efficient process from start to finish.
Prism Grout offers exceptional quality‚ ease of use‚ and durability‚ making it a top choice for tile installations. Its stain resistance and versatility ensure long-lasting‚ professional results for any project.
9.1 Final Tips for Successful Installation
Ensure all surfaces are clean and prepared before applying Prism Grout. Mix powder and water accurately‚ following instructions to avoid lumps. Apply grout at a 45-degree angle‚ pressing firmly into joints. Clean excess grout immediately with a damp sponge. Allow grout to cure as recommended before sealing. Regular maintenance will enhance durability and appearance. Always blend dry powder from multiple containers before mixing for consistency. Keep tools clean and rinse frequently to prevent grout from hardening. Proper technique and patience ensure a professional-looking finish.
Leave a Reply